I struggled for months trying to figure out what to make, what colors to use, what pattern, what about backing and a quilting design? I wanted a timeless sort of quilt that would be useful and lovely for years to come and classic colors that would not go out of style.
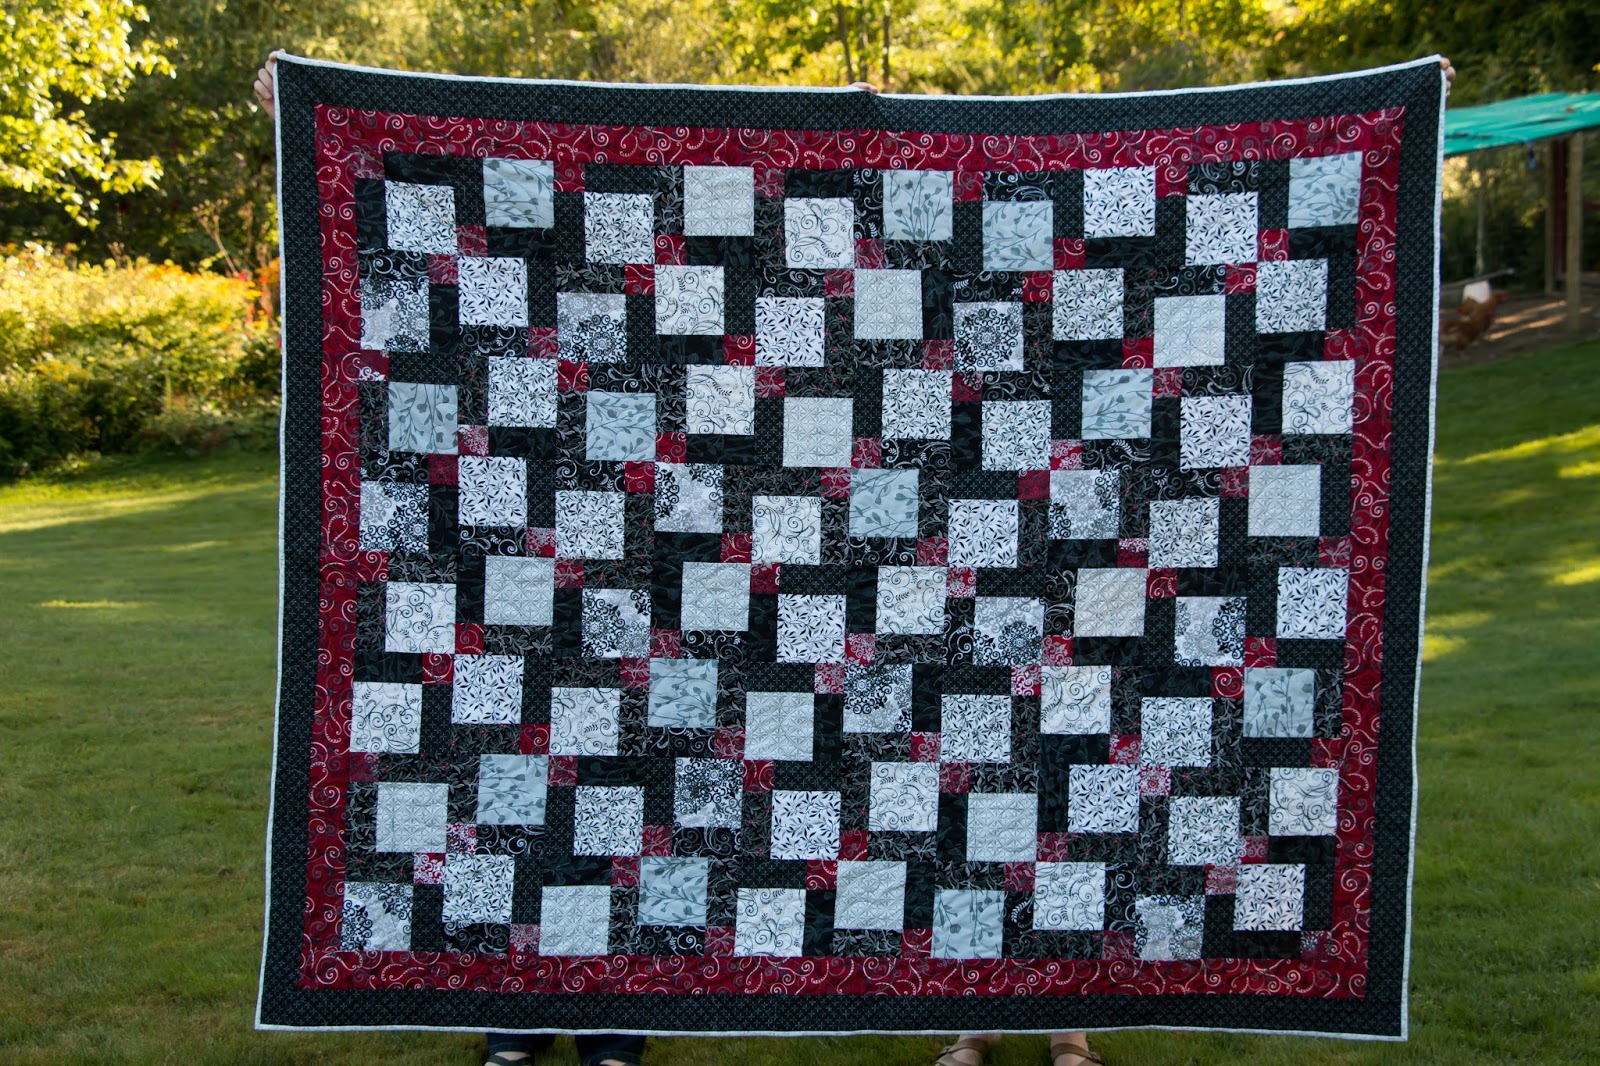
Finally I settled on a black/white/red combination of fabrics from the Black, White & Currant series from Color Principle for Henry Glass Fabrics. I chose fabrics from series 4, 5 and 6 - a total of 14 different fabrics for the top. I purchased fabrics mostly from Fabric.com which is one of my favorite sources, but also from River City Quilts and Beverly's Quilts as well.
Then I moved onto deciding about a pattern. This was much harder as the tendonitis issue in my hand is not 100% resolved so I needed to be sure I was not going to cripple myself in the attempt and wind up not being able to complete the quilt in time for the wedding. I finally chose a disappearing 9-patch that worked up nicely and was fairly easy in cutting so that I didn't re-aggravate the injured hand too much.
On to construction:

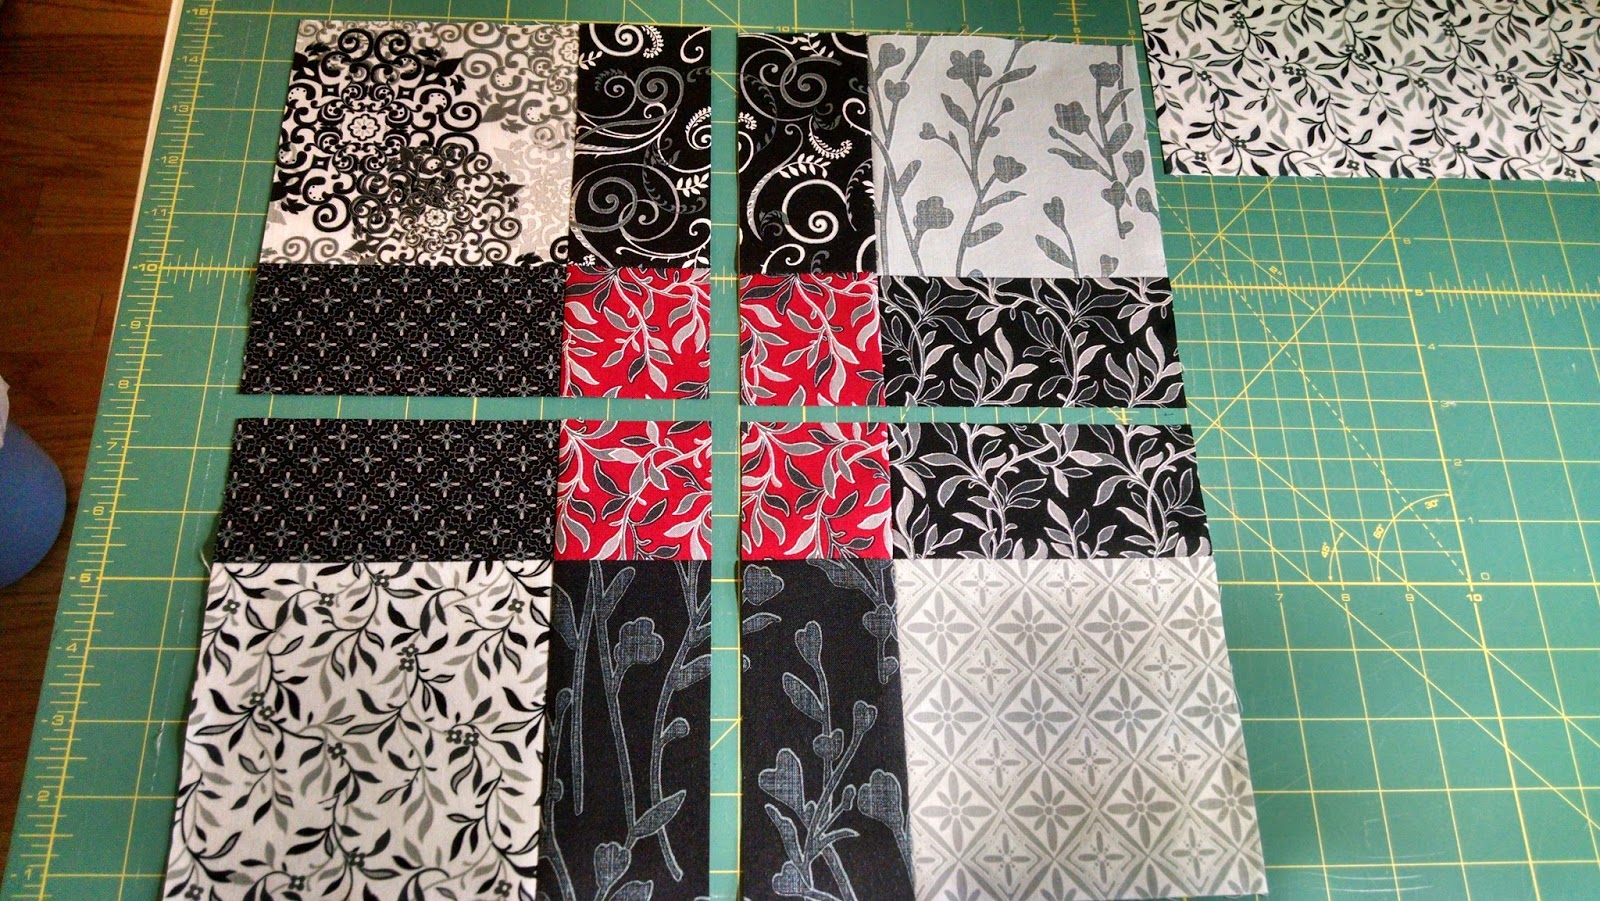

The block is fairly straight-forward to make, starting with a simple 9 patch (top), then cutting through the center in both directions (middle), finally - rotate two opposite corners and re-sew to create the sort of figure-8 design (bottom). There are several wonderful tutorials available on the web if you are interested in more step-by-step instructions.
I made LOTS of blocks - working my way through, trying to evenly distribute all the various fabrics. Every 9-patch had a red center (using 1 of 3 fabrics). The blacks (5 different ones) and the white/grays (6 different ones), made up the outside patches. When cut and resewn, the blacks were all narrow bands and the white/grays were all the larges blocks.
Then everything went up on my design wall and my ever-helpful daughter Jessica provided invaluable assistance to rotate, re-arrange, and critique until we settles on a layout that pleased us both.


 |
| Gypsy offering her help as well |

 |
| Saffron needed to be sure the needle was threaded correctly for me |
 |
| First border was one of the reds to define the edges |
 |
| Final border was a black to give it a finished look |
The backing is a white/gray 108" print from Color Folio by Color Principle for Henry Glass that I thought coordinated nicely, and the quilting pattern I used is called 'Interlocking Hearts' done in King Tut: 'Rosetta Stone' variegated thread by Superior Thread.

 |
| On the frame being quilted |

 |
| Binding is done in the same backing fabric. Attached by machine and then hand-finished. |

 |
| Gypsy supervising binding work on the machine |
 |
| And holding down the quilt for me while I do hand-finishing |

 |
| Backing with sunlight behind |


Finished it covers the entire top of a queen sized bed though I didn't write down what the actual measurements were when I was done. One of these days I'll remember to take better notes of all the vital details and probably should start taking photos of all the fabrics before I start cutting.